Tiger Models Nagmachon Late

This is a 1/35 scale Tiger Models IDF Nagmachon, late version, OOB apart from some stowage and a figure. Thirty five hours which is lightning fast for me. Absolutely lovely build, Tiger Models are just a dream to work on, probably my favourite actually. The fit and molding is just out of this world. Loved every minute of this one.


image2 (2)
image3
image4

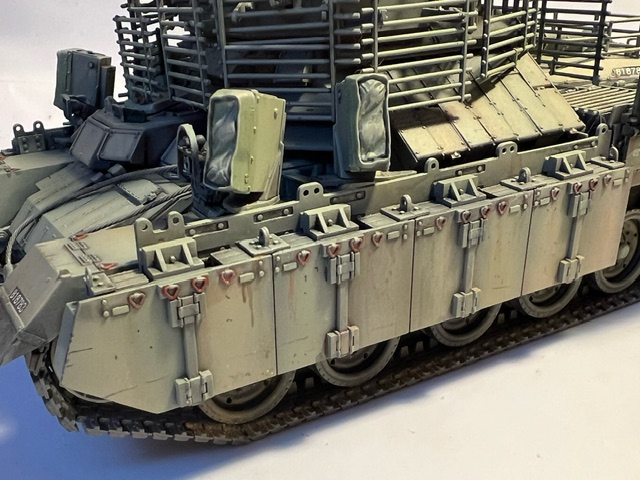
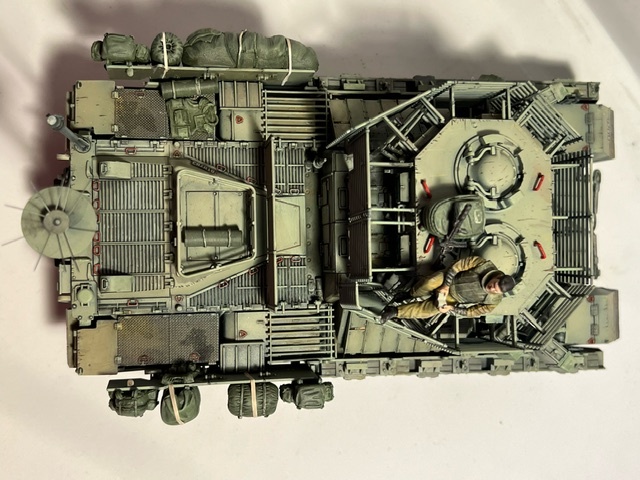
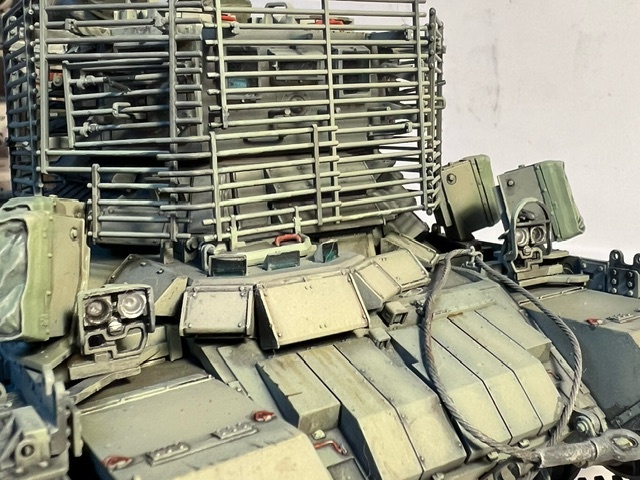
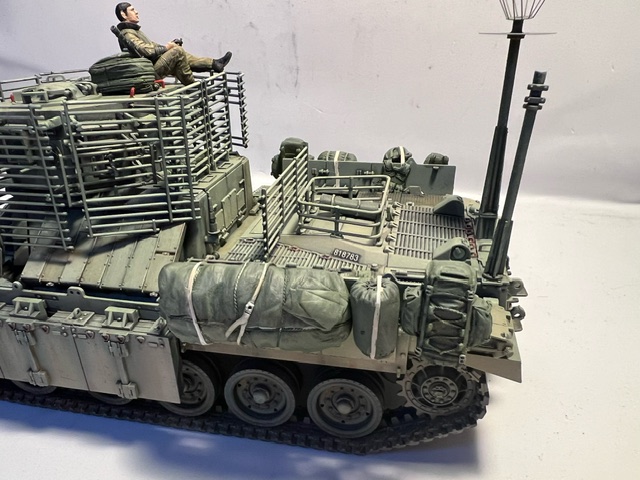
For those of you not familiar with this rather Warhammer-looking vehicle, the Nagmachon is a modified Sho’t Kal hull which as we know is itself a modified version of the venerable British Centurion. When the IDF retired their Sho’t Kal fleet they converted a lot of them to Nagmachots and the Nagmachon is a 52 tonne beast of a specialist low intensity warfare vehicle derived from this. The distinctive “doghouse” on top covered with slat armour has a 7.62mm FN on every corner. A lot of them were used as engineering support vehicles but they have been retired now in favour of Puma and Namer family APC/IFVs.

image5
image6
image7
image8
image9

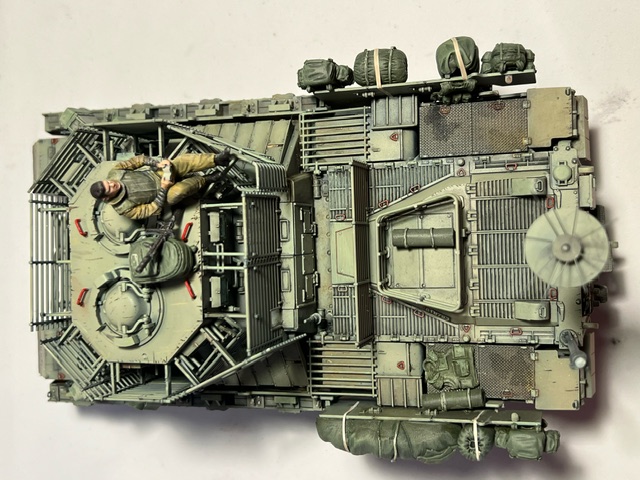
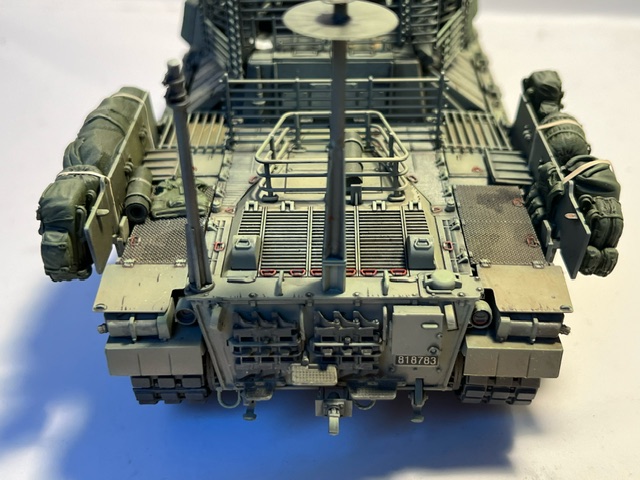
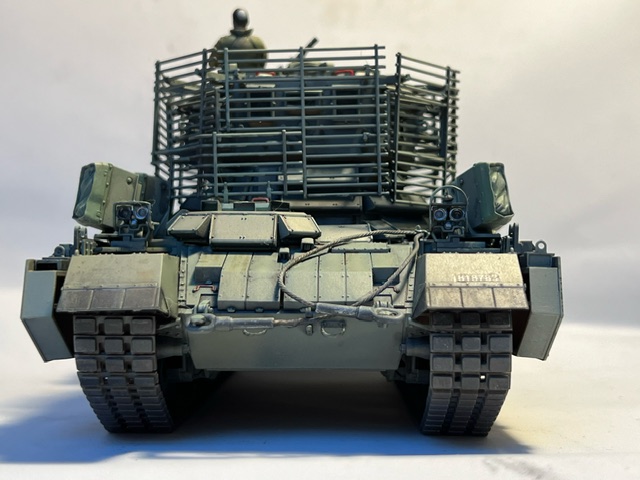
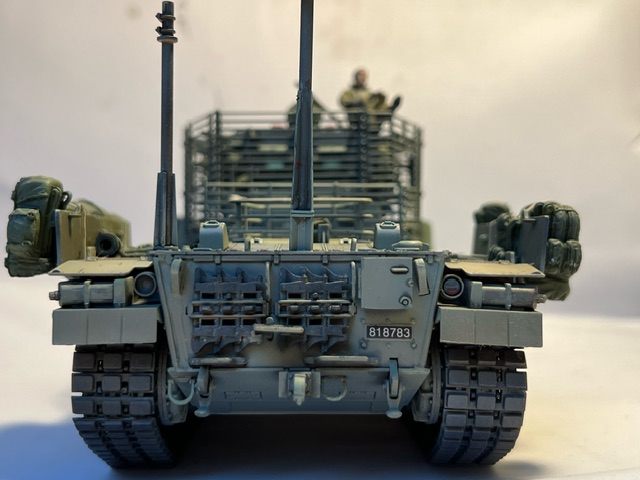
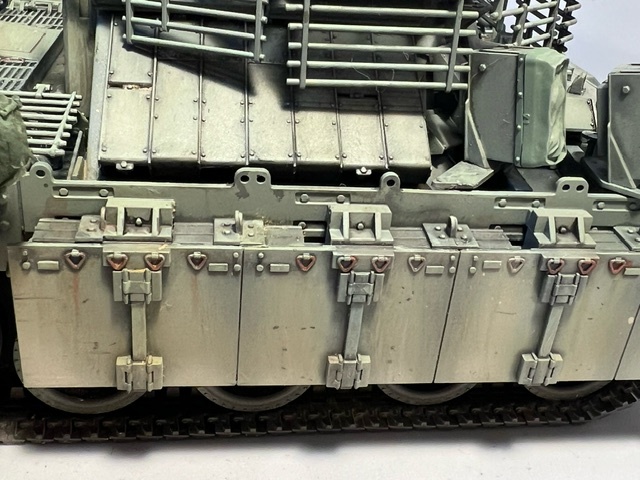
I think it’s come out nicely. It’s a dusty, well worn vehicle but not beaten to hell, nice subtle chipping and paint fading was the order of the day here. There are three airbrush dust passes in three different dust colours, plus three different raw pigments. I know some people look down their nose at putting raw pigment onto a model but I think it’s really effective in this case in adding a couple of non-uniform colours of dust and earthy tones as befitting a vehicle in that part of the world. I chose not to go too mad on the mud so there’s very little on it, although I think I overdid the streaking a bit which is annoying as I think this one of my better builds and I find it a little distracting. A pity. But you live and learn I guess.


image15

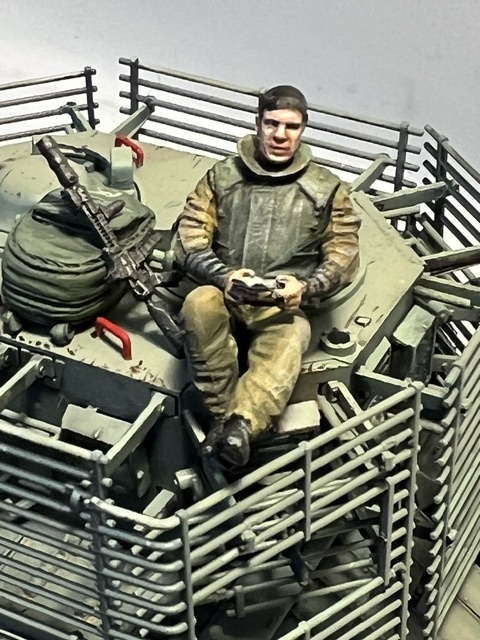
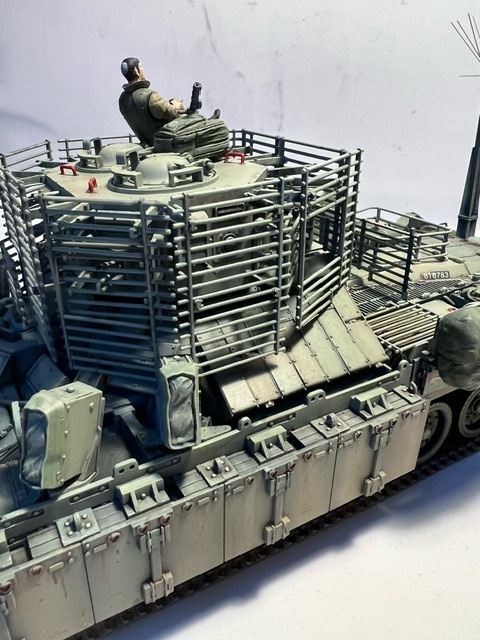
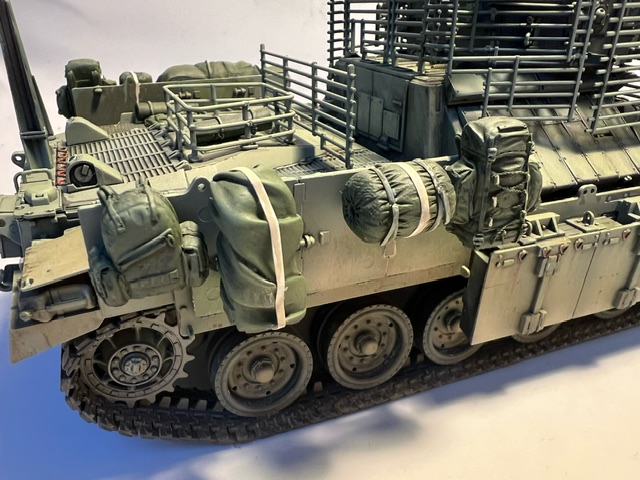
The figure is a praying IDF soldier (with an odd resemblance to everyone’s favourite Vulcan science officer…) wearing a white kippah and teffelin on his arms and head, from Masterbox that I had in the stash left over from the Merkava IV build I did last year. The stowage is IDF and US and Bundeswehr from the stash in IDF green, with straps made from masking tape sprayed beige. The stowage really helps this build I think.

image16

The instructions showed numbers on every section of the side armour but none of the photos I saw had it on there and the number plates were not on the rubber part of the fender up front but just above it, so I went with the reference photos. I think it looks better this way.

All in all I’m fairly happy with it. I wanted to build a Nagmachon with lots of visual interest which is hard as it’s all one colour, but I managed to get lots of different colours and tones in there and the fake shadows I added with panel liner, shaders and some judiciously applied Tamiya X-19 clear smoke help break up the monotony.

Next up is a short break for a week or so while I do some home jobs and then a Canadian Leopard 2A6 from RyeField. I also finally have my huge Ukraine diorama ready to go so I’ll be posting photos of that next weekend.

Do you like it? Anything you would have done differently? Let me know in the comments.

19 Likes

Outstanding Chris, as usual. Your painting and weathering skills are to be admired I would say.

3 Likes

That is a fantastic job Chris! It certainly is a beast of a vehicle and you did a great job on the build. The finish is outstanding- lots of contrast to show all the impressive detail on this kit but not overdone. Right up my alley. Beautiful paint job. And the figure came excellent as well.
As for putting raw pigments on a model, do you mean without water or thinner or fixer I think it’s called? I don’t see what’s wrong with that. I usually do that as a final step after the model is mounted on the base.
Again, outstanding job!

3 Likes

Thank you so much mate, really lovely of you to say.

2 Likes

Thank you mate, I’m glad you get where i was coming from on this one. Its tough to make monotone vehicles look interesting but I love the challenge!

2 Likes

Top class build there, looks terrific. painting and weathering are very well done and you have really nailed the used but not overly abused look. The figure is nice clever touch as well giving it some scale, and also a reflective look with what the soldier is doing … Top marks mate.

3 Likes

Cheers mate :slight_smile:

1 Like

Nice build! :+1:

2 Likes

Absolutely. It can be difficult to get a monotone vehicle to look more interesting. That’s why I’m a big fan of adding different tones to give the model more interest and depth. It’s so much more pleasing to the eye. Outstanding job again!

3 Likes

Great job, Chris!
I have the kit, and this inspires me to break it out of my stash. Did you consider adding anti-slip coating on the vehicle? I have several books on the Nagmachon that give some sense of its locations, but I find getting a detailed mapping difficult.
Regardless, you did a wonderful job, and I really like your figure!
David

2 Likes

Who, ironically enough, was actually Jewish.
Ken

2 Likes

Image result for spock precisely

3 Likes

Man, that is an absolutely fantastic looking beast you made…

2 Likes

Thanks mate :slight_smile:

1 Like

Very nice work. Looks like a good kit. And the results of your build proves it…

3 Likes

Beautiful work. It’s a one kit I need to get and after looking at yours Tiger Model will be the brand. Was it one piece rubber track or individual links? TIA

1 Like

Hi mate - yeah they were really beautifully cast single links with really small sprue gates that didn’t require much in the way of clean-up. Both sides took me about four hours to do and I used a Trumpeter blue metal track assembly jig tool. Trick is to glue the links together using Tamiya Extra Thin and then when they are set, going back over the inner connections from the top with Tamiya white top glue which flows into the gaps and makes the connection nice and strong. These were by some distance the easiest single indy link tracks I’ve done.

If I have any complaints with the built itself it is that the main upper hull join needed some filler putty along the joins and some filing down on the lower hull piece to fit properly - I suspect I may have missed a cue earlier in the instructions to remove or file down some tabs on the lower hull piece but if i didn’t, then you will need to. Its okay, its not a major thing and as you can see it goes together nice regardless at the end but something to bear in mind.

I’d also leave off the bar armour on the doghouse until after painting if I built one again as removing the masking tape off the vision ports once assembled and painted was a challenge and required use of a very sharp metal toothpick thingy i had kicking round.

Last thing to watch out for as you can probably see above, there are a load of whacking great big sink marks in the rear plates above the sprocket. I filed and filled these but didnt do a good enough job. The stowage hides much of them but regrettably there are some that were not dealt with sufficiently that stick out like a sore thumb and prevent this from being a build I could ever present at a show. Its annoying because I did sort them but not quite 100% and I think because they are right in the eyeline you tend to see them more. Frustrating and a major regret on this build. I’d recommend really nailing them when you build yours, filing them right down or even cutting away the mountings and using a thinner plasticard to recreate the plating as my suspicion is the plastic as molded is a wee bit too thick to look scale. I don’t think it is five inch thick plate in real life, put it that way. Easy enough to scratch I reckon if you are so minded.

2 Likes

Many thanks Robert.

2 Likes