Even though modern technology has (almost) eliminated the need for these old-world methods, there’s still a healthy hobbyist market for people who enjoy preserving their own food.
This guide loosely ranks those methods based on their difficulty, time needed, energy usage, shelf life, and cost. For example, many people are familiar with canning, but it’s more difficult and energy-intensive than methods like fermentation or pickling.
This list starts with the universal basics, which are mostly used with fruits and vegetables. There’s specific info about meat, fish, eggs, and dairy at the end.
Some preservation methods combine well, such as freezing, which works better if you vacuum seal the food first to reduce freezer burn. Similarly, canning will make pickled or fermented foods last longer.
If you’re looking for traditional books on the subject, check out:
- Preserving Food without Freezing or Canning: If you only buy one of these books, this is the one to get.
- Wild Fermentation: From a leading expert. Covers the science, recipes, and techniques of fermentation across a wide variety of foods.
- The Preserving Answer Book: This book has a few beginner tips and recipes, but it’s real purpose is as a FAQ for thorny preserving questions covering all sorts of methods.
- The All New Ball Book Of Canning And Preserving: If you’re looking to learn the intimidating art of canning, this is the one book you must have.
- The Art of Natural Cheesemaking: A solid book on the art of turning milk into cheese, a classic method of preserving dairy.
Related articles:
- Avoid the need for preservation with these freeze-dried food kits
- Best foods to grow in a survival garden
- Beginner’s guide to survival gardening
| Method | Difficulty | Preservation Time | Works For | Drawbacks |
| Freezing | Easy | Years | Fruits, vegetables, meat | Energy intensive |
| Fermentation | Easy | Months | Primarily vegetables, but also fruit, meat, grains, and dairy | Finicky, sour |
| Canning | Hard | Years | Fruits, vegetables, meat | Energy intensive, botulism concerns |
| Drying | Easy | Months | Fruits, herbs, grains, meat/fish | Takes a long time |
| Freeze Drying | Easy | Years | Most foods | Expensive |
| Vacuum Sealing | Easy | Years | Dry or frozen foods | Requires electricity and bags |
| Mylar Bagging | Medium | Years | Dry goods | Expensive, burns |
| Wintering Over | Easy | Months | Hardy Vegetables | Risky |
| Root Cellaring | Varies | Months | Vegetables, canned goods, ferments, dried foods | Big investment, elemental exposure |
| Pickling | Easy | Months | Vegetables, eggs | Sour |
| Alcohol | Easy | Years | Fruits | Inebriation |
| Sugaring | Medium | Years | Fruits | Labor-intensive, need large quantities of fruit, high sugar content |
| Oil/Fat | Easy | Years | Cooked or dehydrated fruits and vegetables, cheeses, meat | Expensive. Fat-preserved meats are a botulism risk. |
| Salt/brine | Easy | Months or Years | Some vegetables, meat/fish | Salty. Only works well with certain foods. |
| Smoking | Medium | Days to years (if combined with other methods) | Meat/fish | Can be tricky. Usually combined with curing. |
| Curing | Hard | Years | Meat | Curing salt is toxic if used improperly |
| Lye | Just don’t | No idea | Fish and olives | No sane person should do this |
| Water Glassing | Easy | Months | Eggs | Must have plenty of perfect eggs. One bad egg spoils the batch. |
| Butter | Medium to Hard | Days (can be combined with other methods) | Cream | Labor intensive |
| Cheesemaking | Hard | Years | Milk | Difficult and fussy |
Be prepared. Don’t be a victim.
Want more great content and giveaways? Sign up for The Prepared’s free newsletter and get the best prepping content straight to your inbox. 1-2 emails a month, 0% spam.
Freezing
- Difficulty: Easy
- Preparation time: Minutes
- Energy use: High
- Preservation time: Years
- Cost: Medium
- Works alongside: Vacuum sealing
You can freeze pretty much any sort of food with the proper preparation, and food can last for years in the freezer.
The obvious major downside is the need for lots of electricity. Large enough solar panels can power a freezer, and there are propane-powered freezers on the market, though they’re expensive. A handful of freezers can work on both electricity and propane.
Your primary spoilage concern with freezing is freezer burn, which is caused by sublimation of water from your foods. Freezer burn causes a weird smell and taste, ice crystals, and discolored spots, but freezer burnt food is still safe to eat. Sometimes you can fix freezer burn by rinsing the food in cold water before cooking it.
You can prevent freezer burn by keeping your freezer as cold as possible, avoid opening the door unless necessary, and properly packaging your food to minimize oxygen.
Freezing and vacuum sealing go together like peanut butter and jelly. The vacuum sealer sucks out the oxygen and seals the bag well enough to freeze foods for years.
Fermentation
- Difficulty: Easy
- Preparation time: Minutes
- Energy use: Low
- Preservation time: Months
- Cost: Low
- Works alongside: Canning (makes fermented food last long, but kills beneficial cultures)
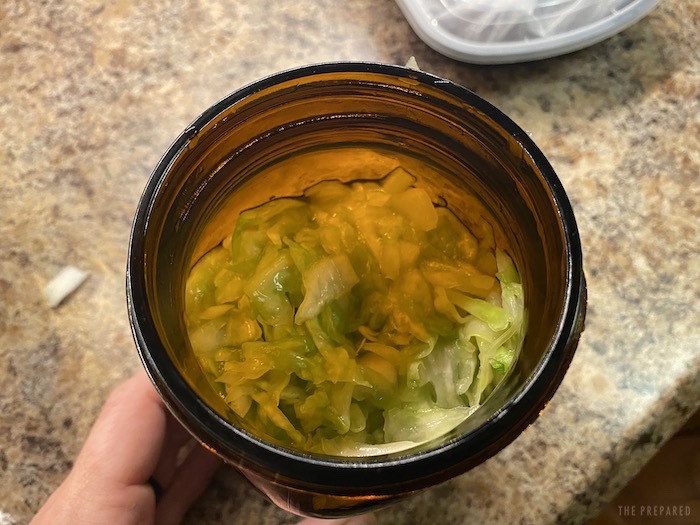
Moving further into the off-grid realm, fermentation is one of the easiest and best ways to preserve food. But it can be scary to the uninitiated because it involves live cultures — the microorganisms that make food like kimchi really healthy.
Fermented foods have strong flavors that some don’t like. Most fermented vegetables (eg. sauerkraut) are extremely sour due to high vitamin C levels — Captain James Cook successfully prevented scurvy in his crew thanks to barrels of sauerkraut.
Most any food can be fermented, including vegetables, fruits (usually when making cider or wine), grains (making beer), meat, and dairy (yogurt and kefir).
When fermenting vegetables, they’re submerged in salt and water to ward off molds and other pathogens. This encourages the growth of lactobacillus, a type of beneficial bacteria that crowds out ‘bad’ pathogens like salmonella and E. coli. Lactobacillus is a probiotic, and fermentation is known to create B vitamins.
Fermentation is one of the few methods that actually makes food better — namely easier to digest and more nutritious. Other methods like canning will destroy nutrients, while freezing and dehydration will keep things the same (at best).
Fermentation can also remove toxins from food. Cassava is a staple in parts of Africa and Asia, but contains high amounts of cyanide until it’s fermented. Jerusalem artichokes are a popular preparedness crop, but are notoriously hard to digest (some call them “fartichokes”). Fermentation reportedly makes Jerusalem artichokes much easier on your stomach.
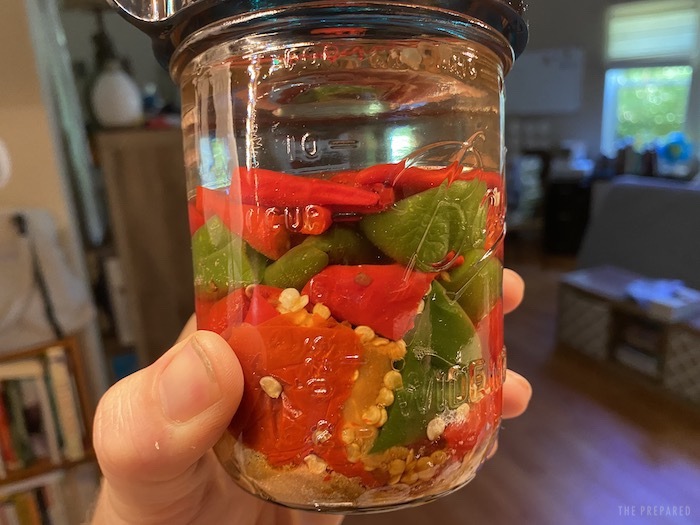
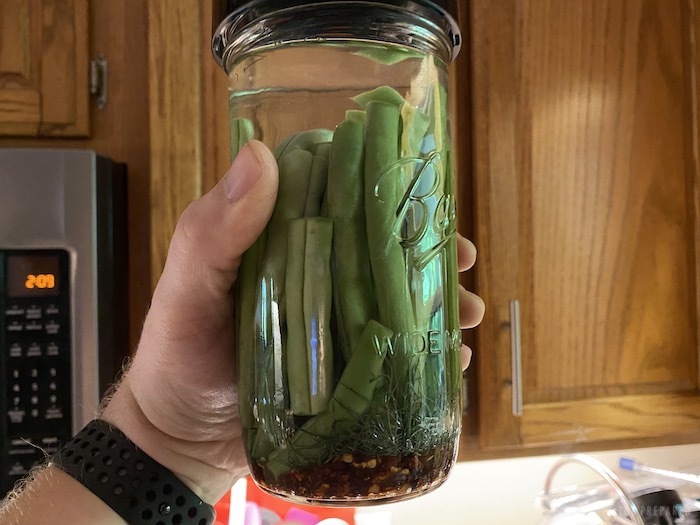
Many vegetables take well to fermentation, especially cabbage, which can be made into sauerkraut or kimchi. Cucumbers ferment well, as do radishes, carrots, green beans, and peppers, which can be made into hot sauce.
Fermenting vegetables takes very little time and equipment. You need:
- A clean non-reactive container, like a Mason jar or (more traditionally) a ceramic crock. A plastic five-gallon bucket can be used in a pinch.
- A gas-permeable lid, like cheesecloth or specialty vented lids. As food ferments, it releases gasses that can break the container. You can get by with a regular lid as long as you remember to “burp” the container every few days by quickly opening and closing it.
- Clean water, with chlorine filtered out. (Chlorine can prevent the fermentation process.)
- Salt without iodine or other additives, like canning and pickling salt. Iodine can prevent the fermentation process.
- A weight of some sort to keep the vegetables under the brine.
- (Optionally) a plate of some sort to better cover the vegetables and keep them under the brine.
When fermenting most vegetables, you create a brine with salt, water, and other spices. Cabbage is a bit different. Because cabbage is so full of water already, there’s no need for a wet brine, you simply shred the cabbage, mix it thoroughly with salt, and let the brine develop naturally.
Most ferments are ready to eat within one to two weeks, sometimes in a matter of days. You can stop the fermentation process by putting the fermented food in the refrigerator. If you’re without power, you can let the fermentation process continue, and the flavors and nutritional value will strengthen over time until the food eventually ferments into mush.
One gotcha with fermentation is mold growth — often attributed to insufficient salt in the brine, but it can happen to the best ferments. Some say you can simply skim the mold off the surface while others insist you must throw the food out.
Don’t confuse mold with kahm yeast, which is a white, milky substance that can grow in the jar. Mold tends to be fuzzy with blue or green colors in addition to white. Kahm yeast isn’t harmful, and can safely be skimmed off.
If your ferment goes bad, it will give off an unmistakable foul odor and you should throw it out. A sweet, sour smell is normal, but it shouldn’t be downright unpleasant.
You can prolong the shelf life of fermented foods by canning, but the heat of the canning process will destroy the beneficial cultures.
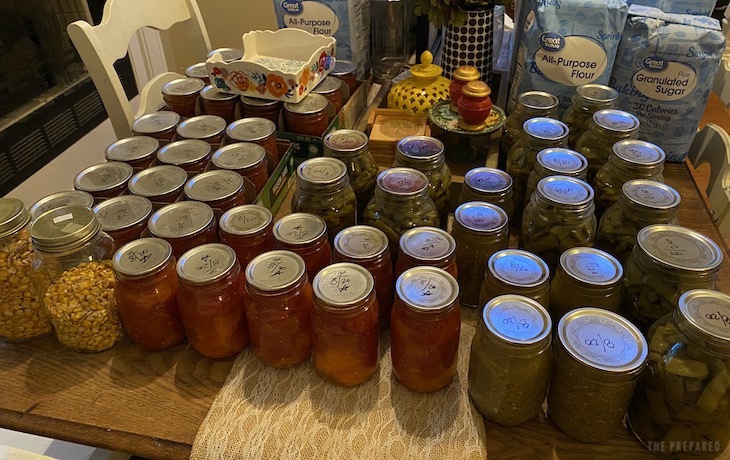
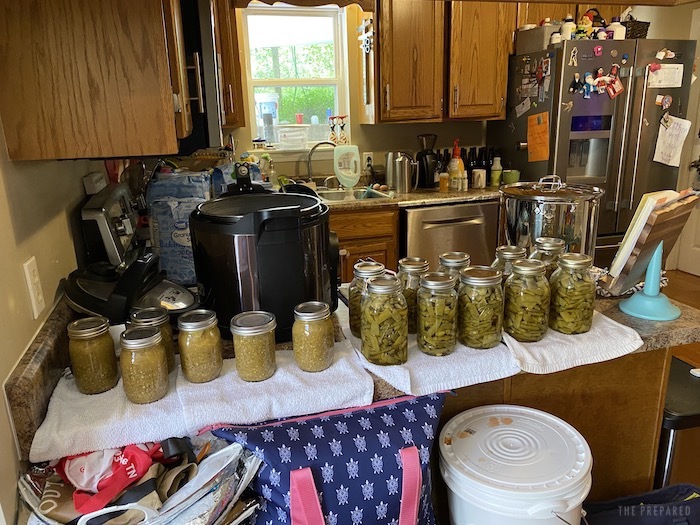
Canning
- Difficulty: Hard
- Preparation time: Hours
- Energy use: High
- Preservation time: Years
- Cost: High
- Works alongside: Fermentation, pickling, sugar preservation, brining
When many people think of off-grid preservation, canning is the first thing that comes to mind because many of our grandparents did it.
However, canning is a tricky process. Performed improperly, you can poison your family with nasty pathogens like botulism. Canning takes a great degree of skill, a lot of energy (like electricity or burning wood), special jars, special lids, tongs, and possibly a special canning device.

The easiest and safest way to get started canning is with water-bath canning, which is only recommended for acidic foods like tomatoes. Water-bath canning takes little in terms of special equipment because you only need to boil the jars. Leading canning equipment company Ball sells a water-bath canning kit with most everything you need except a large cook pot.
However, to preserve a wider variety of non-acidic foods, like green beans or meat, you must use a pressure canner to properly heat the food to destroy pathogens. The leading manufacturers of pressure canners are Presto and All American Pressure Canner. Presto makes an all-electric pressure canner, the Presto Precise. Beware of using electric pressure cookers to pressure can, as they cannot reach safe canning temperatures.
Traditional pressure canners require precise temperature control, which can be difficult to achieve with off-grid fuels like propane and wood. Also be aware that pressure canners are very heavy when fully loaded, and can crack glass cooktops.
You also need Mason jars to put your food in. The best brands are Ball and Kerr. The jars come with rings, which can be reused, and lids, which cannot be reused (at least for canning). Mason jars come in many sizes and two shapes:
- Curved, which are more space efficient in canners.
- Straight-walled, which aren’t as space efficient but can be safely frozen.
The condition of the Mason jar is critical — any chips in the glass, especially around the rim, can cause explosions or pathogen intrusion. Retired Mason jars can be used for fermentation, pickling, dry good storage, or as drinking glasses.
More resources:
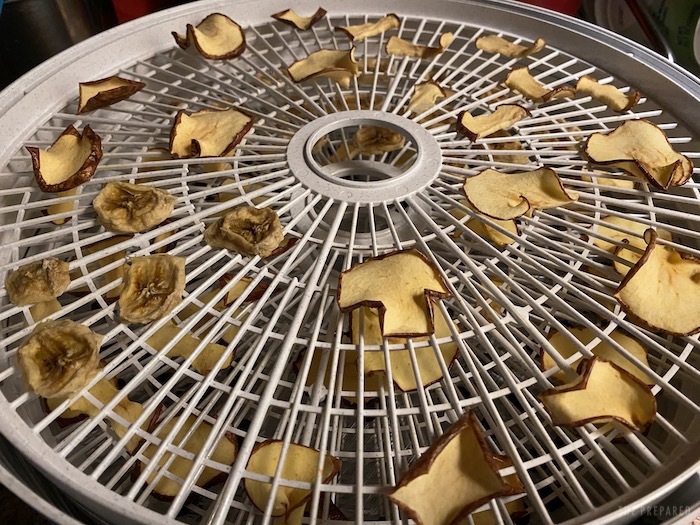
Drying
- Difficulty: Easy
- Preparation time: Minutes to hours
- Energy use: Low
- Preservation time: Months
- Cost: Low
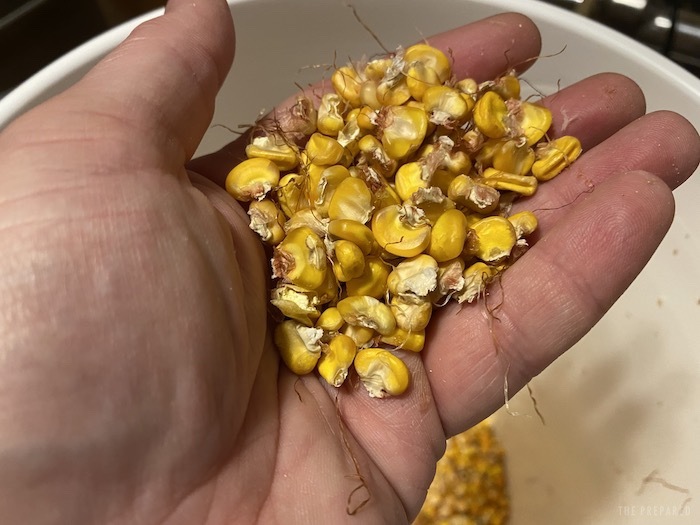
Drying is a timeless and low-stress way to preserve fruits, herbs, and grains. All you really need to dry food is warm air with good circulation. There are a few ways to achieve this:
- In an oven on the lowest temperature setting with the door cracked open
- Drying racks placed outdoors, covered from the elements
- Drying racks placed over a radiator or wood stove — even up in the rafters
- Trays placed on a car’s dashboard
- Bundles of herbs hung under a porch
- Commercially available drying machines
Preserving Food without Canning or Freezing offers instructions on building drying racks, as well as specifics on drying various foods.
Dehydrators are an easy way to get started if you’re unsure of the other methods. Nesco’s machines are reasonably priced and reliable. They also include inserts for making fruit leather (like Fruit Roll-Ups) and beef jerky.
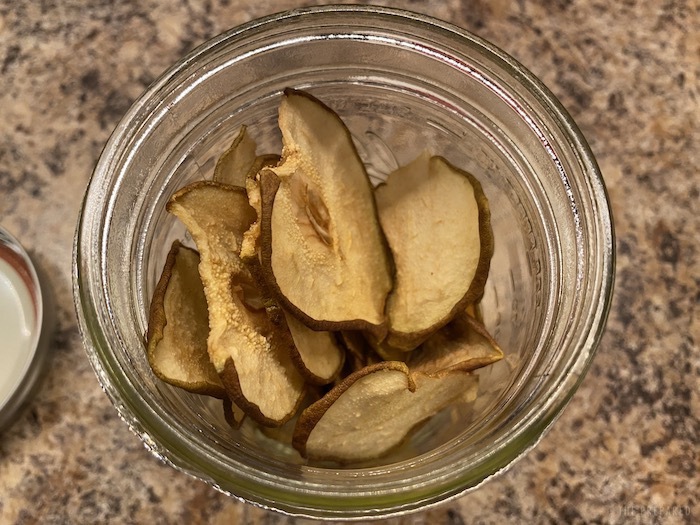
Small fruits, like blueberries and raspberries, can be placed directly onto drying racks once all stems and leaves are removed (it might help if you pierce them first). Larger fruits, like apples and tomatoes, should be thinly sliced before drying.
Drying intensifies the flavors of fruits. Pear chips, in particular, are incredibly sweet. Dry tomato chips have a tarty sweetness that’s tough to beat.
Once the foods are thoroughly dry and show no evidence of moisture, move them to an airtight container, like a Mason jar. Depending on your environment, they can last months or years.
Dried foods can be eaten on their own as a snack, or incorporated into dishes. For example, dried tomatoes can be mixed into a batch of chili.
Freeze drying
- Difficulty: Easy
- Preparation time: Minutes to hours
- Energy use: Medium
- Preservation time: Years
- Cost: High
Freeze drying is arguably the best preservation method except for the fact it’s expensive to do on your own. So while freeze-dried survival food is some of the best off-the-shelf stuff you can buy for prepping, it’s hard to DIY.
Freeze dried foods retain much of their flavor and nutritional value, and can sit on a shelf for decades when properly stored. You can freeze dry pretty much any food: vegetables, fruits, meats, cheeses, and even eggs.
Harvest Right is a prominent maker of freeze-drying machines, but they start at over $2,000. Add an extra $1,500 if you don’t want to worry about changing the oil in the pump.
The smallest Harvest Right machine will take up 16.5″ W x 18.5″ D x 25″ H in your kitchen and weighs 139 pounds. That machine holds three trays of 7.75″ W x 14″ L x 0.75″ H — much of the Harvest Right’s bulk consists of necessary machinery.
Vacuum sealing
- Difficulty: Easy
- Preparation time: Minutes
- Energy use: Medium
- Preservation time: Years
- Cost: Medium
- Works alongside: Freezing
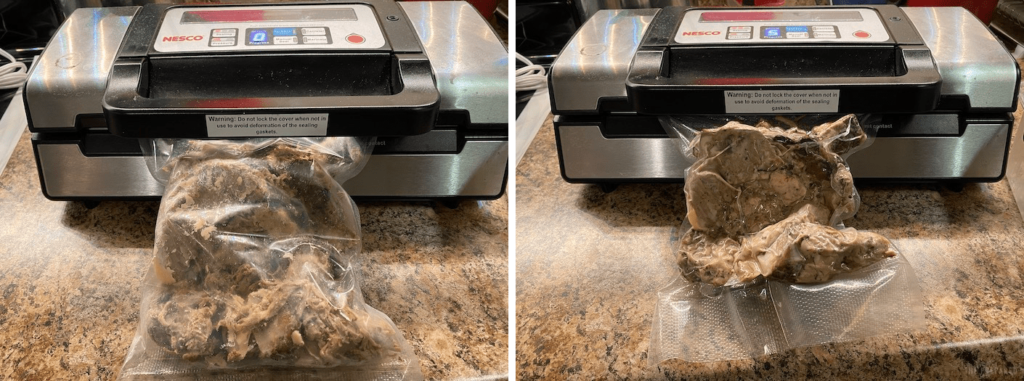
Vacuum sealing is a great way to preserve dry goods and freeze fresh foods. It can seem intimidating, but a good machine like the Nesco VS-12 can do much of the work for you.
Plastic vacuum seal bags come in rolls of different widths. You cut off the length you want (better machines have a built-in cutter), seal one end, put your food in the bag, stick the other end in the machine, and the machine sucks out the air and seals the bag. The final product is free of air and incredibly compact, ready to be safely stashed in a bucket or in the freezer.
Vacuum sealing also goes great with sous-vide cooking. Vacuum seal individual cuts of meat and throw them in the freezer. You can later throw them directly into the sous-vide bath without defrosting.
Vacuum sealing only has a few drawbacks:
- The initial investment can be expensive
- You need to keep a supply of bag material around
- Powdered foods, like flour, can gum up the machine
There’s a trick to vacuum sealing powdered food: first put it in a paper bag and then loosely fold over the top. Your vacuum sealer can suck out the air while not sucking up a bunch of dust.
Mylar bagging
- Difficulty: Medium
- Preparation time: Minutes
- Energy use: Low
- Preservation time: Years
- Cost: Medium
- Works alongside: Vacuum sealing
Mylar bagging is popular among the prepper crowd, but many people find it absolutely miserable and believe vacuum sealing is almost always a better solution. But first, the benefits of mylar bagging:
- Takes little in the way of special equipment.
- Can preserve large quantities of food at a time. Five-gallon bags are common.
- Mylar blocks light.
- Mylar bagged foods can last for decades when properly stored.
- Can be combined with vacuum sealing using special bags.
- Mylar can be used to protect objects other than food, such as bullets or electronics.
- There’s debate whether Mylar would protect an electronic from an EMP.
The downsides of Mylar bagging:
- The bags and required oxygen absorbers are expensive.
- Oxygen absorbers spoil quickly when exposed to air, and it’s difficult to find individually wrapped absorbers, so you either need to create several bags at once or be ready to vacuum seal the excess.
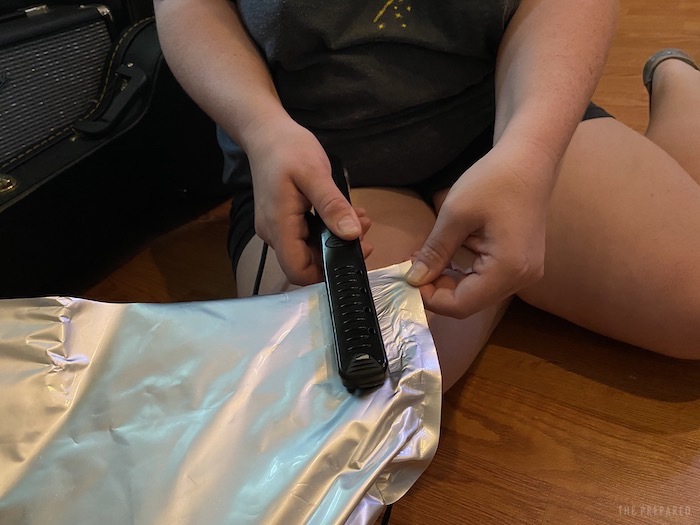
- Mylar bags require heat to seal, usually accomplished with a clothes iron or curling iron.
- The process is awkward and it’s easy to burn yourself, either with the iron or the hot mylar.
- Mylar can stick to your food over the years, leaving traces in your meal.
On paper, mylar bagging is a simple process. Fill the bags, partially seal either with a flattening iron or a clothes iron and a wooden 2×4, prepare more bags, and once you’re ready, toss in oxygen absorbers and seal them shut.
It’s not unusual for a mylar bag to still be a little puffy after you do this. The oxygen absorbers suck out oxygen, but there might be other gasses in the bag, eg. nitrogen. Sometimes the seal fails entirely and you’re forced to open another pack of oxygen absorbers.
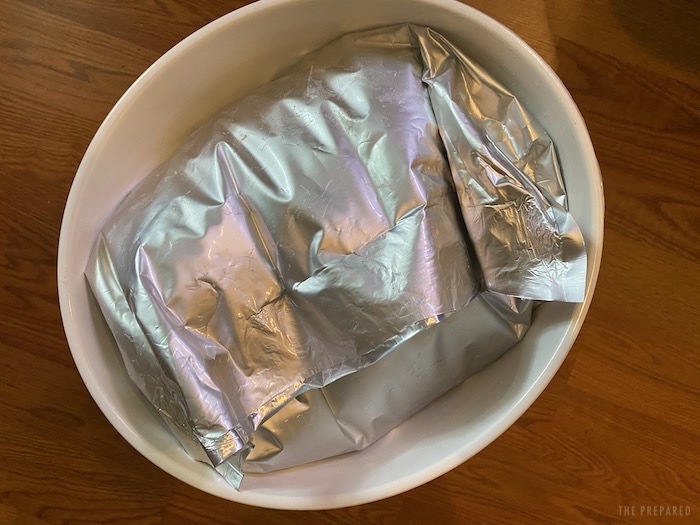
Once your food is sealed and cooled, throw it into a five-gallon plastic bucket and seal with a lid, which keeps rodents out.
Tip: Never use oxygen absorbers when mylar bagging sugar. They will turn your sugar into a brick.
Wintering over
- Difficulty: Easy
- Preparation time: None
- Energy use: None
- Preservation time: Months
- Cost: None
You won’t find an easier method than this. Many root vegetables, like potatoes, sweet potatoes, turnips, and carrots can be left in the ground over winter and picked as needed. Many above-ground cool-weather crops, like kale, can hold up to cold temperatures just fine and be picked over winter. This technique is only reliable in USDA zones 7 and below.
Wintering over doesn’t come without risks. Your root vegetables may rot or be eaten by pests before you harvest them. But it can’t be beat in terms of time, money, and effort.
In the harshest freezes, you can cover crops with straw to protect them from the frost. But be sure to remove it as the temperatures rise, because the straw can cause your vegetables to rot.
Other crops that winter over well:
- Brussels sprouts
- Cabbage
- Cauliflower
- Chicory
- Endive
- Escarole
- Jerusalem artichoke
- Kale
- Lamb’s lettuce
- Leek
- Parsnip
- Radish
- Salsify
For lettuce and cabbage, you can dig a ditch alongside the plants, and then carefully bend them over, leaving the roots in the ground — called “heeling in.” You can then cover the trench with straw or branches.
Root cellars
- Difficulty: Easy if you have a cellar, extremely difficult if you need to dig one
- Preparation time: Variable (excavation and construction required)
- Energy use: None
- Preservation time: Months
- Cost: Variable
- Works alongside: Fermentation, canning, pickling (you can store your jars in the root cellar)
Root cellaring works on a very simple principle: it’s cooler underground than above ground. So in the days before refrigeration, homesteaders would dig out underground rooms to store fall crops like apples, cabbage, and potatoes over the winter.
Not many homes come with a root cellar these days. Many modern homesteaders will dig one out, but there are alternatives. If your home has an underground basement, it may stay cool enough to preserve your food.
Failing that, there are simpler alternatives, like in-ground silos. That can be as simple as an earthen pit covered with a wooden plank, or you can line the pit with brick or stone. Many modern homesteaders bury steel trash cans in the ground. Some simply fill a trash can with vegetables and put it in an outbuilding on a platform to promote good air circulation. What will work for you will depend on how cold your winters are.
There are some tricks to root cellaring as well. Apples release a gas that ripens food, so they should be stored apart from anything else. Root vegetables last longer when buried in sand or sawdust. Tomatoes and squash should be wrapped in paper.
Pickling
- Difficulty: Easy
- Preparation time: Minutes
- Energy use: Low
- Preservation time: Months
- Cost: Low
- Works alongside: Canning, oil
Pickling is akin to fermentation, except instead of a brine, you soak the food in vinegar. Pickling doesn’t carry the same health benefits as fermentation, and pickled foods taste sour. But pickling isn’t an active process like fermentation — so it’s better at longer-term preservation.
Pickling is a simple enough process. Like fermentation, you need clean jars — though you want proper unvented lids for pickling, because no gas is being released. You’ll want to follow a recipe, especially when starting out, because firmer vegetables need a pre-pickle boil or a soak in boiling water, and some vegetables do better when the vinegar is cut with unchlorinated water.
Alcohol
- Difficulty: Easy
- Preparation time: Minutes
- Energy use: Low
- Preservation time: Years
- Cost: Low
Alcohol is an excellent preservative, and it’s traditional to soak certain fruits in wine or brandy, such as apricots, prunes, and raspberries.
There’s only one real drawback (or is it?) of preserving food this way: eating it will get you snookered.
Sugar
- Difficulty: Medium
- Preparation time: Hours
- Energy use: Medium
- Preservation time: Years
- Cost: Low
- Works alongside: Canning
A time-honored way to preserve fruit is to cook it with sugar into jams, jellies, butters, conserves, preserves, marmalades, chutneys, and syrups. It may seem counterintuitive that sugar, which is known to feed microorganisms, can preserve food — but the key is overwhelming amounts. When bacteria is overloaded with sugar, it’s unable to absorb water. So when used as a preservative, sugar acts similar to salt in that it dries out the food around it.
It can be difficult to know the difference between various types of fruit and sugar concoctions, so here’s a quick guide:
- Chutney: Similar to a jam, but vinegar is mixed in with the sugar. Many Western chutneys are sweet and made from fruit, but in India, where chutney originates, chutneys are made from all kinds of fruits and vegetables and can be sweet or savory.
- Fruit butter: Made with fruit pulp and sugar.
- Jelly: Made with fruit juice and sugar. Can be made cooked or uncooked.
- Jam: Made with crushed fruit and sugar.
- Conserves: Similar to jam, but combined with raisins, nuts, and coconut.
- Marmalades: Usually made with citrus fruit, along with peel.
- Preserves: Made with whole small fruits or small chunks of large fruit in a syrup.
There are a few disadvantages to sugar as a preservative. One is that making these delicacies takes a lot of work, as well as a lot of materials. One recipe in Preserving Food without Freezing or Canning calls for 10 pounds of apples. And, of course, they’re loaded with sugar, which may be a good thing in a survival situation when you need calories.
Oil
- Difficulty: Easy
- Preparation time: Minutes
- Energy use: Medium
- Preservation time: Years
- Cost: Medium-high
- Works alongside: Drying
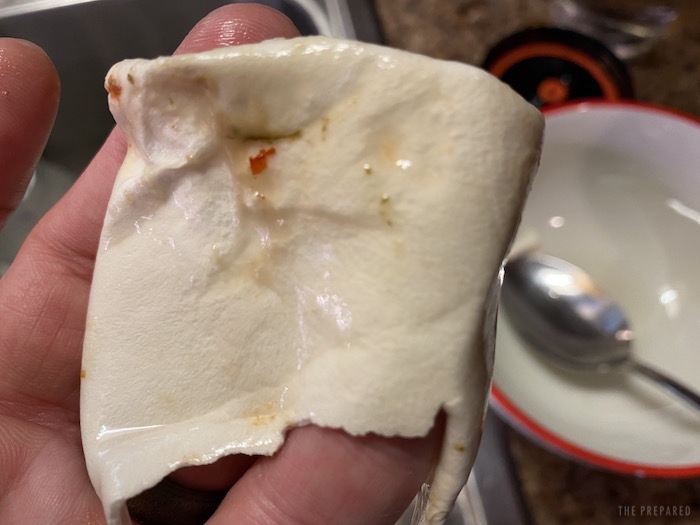
This one is about as simple as it gets: cook vegetables, put them in a jar, and cover them in oil, usually olive oil. The classic example is sun-dried tomatoes in oil. You can also preserve some cheeses, like mozzarella, this way.
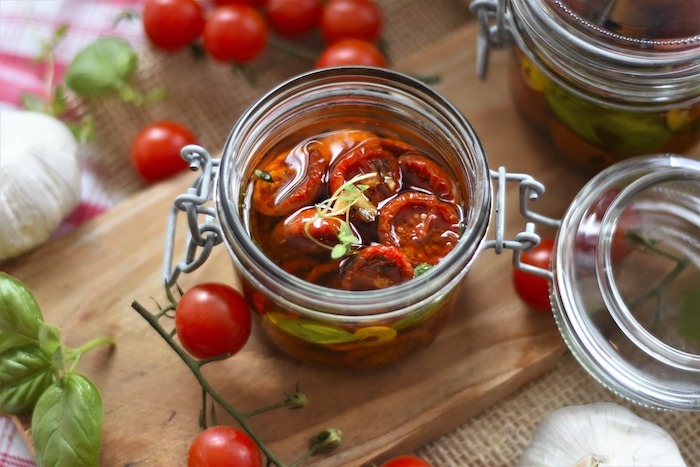
Oil-preserved foods can last indefinitely, or at least until the oil goes rancid. There are two big downsides: good quality oil is expensive outside of the Mediterranean and oil-preserved foods are, by nature, oily.
Brining
- Difficulty: Easy
- Preparation Time: Minutes
- Energy Use: Medium
- Preservation Time: Months to Years
- Cost: Low
Salt is usually used to preserve meats and cheeses, and of course it’s used for fermentation, but it can also be used to preserve some vegetables, usually green beans. The difference between the fermentation process and the salting process is the amount: much larger quantities of salt are used in salt preservation.
Preserving meat (including fish)
Preserving meat is trickier because it spoils faster than fruits and vegetables.
Most people already freeze meat. If you buy a vacuum sealer and use it before freezing, your frozen meat will stay fresher longer.
Salting
Salting is the simplest of the less-messy methods used to preserve meat the traditional way. Examples include salt pork, salt fish, and corned beef. Pork is usually preferred over beef for salt preservation because it has the right mix of meat to fat that keeps it from falling apart over time.
Making salt pork is easy. Simply take a large vessel, add a good amount of salt, add pork, more salt, and so on. Make sure the meat is thoroughly covered in salt. You then pour in water that’s been heavily salted (possibly with other spices for flavor) to top off the container, and cover.
Dehydrating
Another simple method that can be implemented in the field. As you remove water from the meat, it becomes tougher but lasts longer on a shelf. So there’s a tradeoff. The beef jerky you buy from the supermarket doesn’t last long, for example, because they kept it juicy.
Homemade beef jerky is the most popular form. It’s easy to make — all you need is raw meat, seasoning, and a dehydrator.
A classic American survival dish is pemmican, made of chopped-up dry meat and berries, mixed with melted tallow to form a firm ball or bar.
Smoking
A variation of drying is cold smoking, where smoke (not heat) passes over the meat and dries it out. That can be as simple as setting strips of meat high over a campfire.
Or you can buy an A-MAZE-N-SMOKER, a metal gizmo that holds wood pellets in place so you can cold smoke in any suitable container, like an electric smoker or grill. TV cook Alton Brown shows how you can rig up a cold smoker from a cardboard box.
When smoking fish, it’s important to first form a pellicle on the flesh. A pellicle is a tacky, matte coating that helps smoke stick to the meat. One way to do this is to leave the fish uncovered in the fridge. Another is to run a fan over the fish until the pellicle forms.
Curing
Curing is perhaps the best-known of the classic meat preservation methods. Examples include salami, pepperoni, and corned beef. But it’s not an easy process.
It’s often combined with cold smoking, as Brown showed in the above video. While curing salt is preferred over normal table salt, it has sodium nitrite, which is toxic. But the sodium nitrite is converted to nitric oxide as the meat cures, making it safe to eat. When using curing salt, try not to use more than needed in order to keep the risk down.
Lye
Lye has sometimes been used to preserve food, most notably lutefisk and olives. There are people who will use drain cleaner to preserve olives. But we don’t recommend using lye for a variety of reasons, not the least of which is… why?
Suspending in fat
Fats are another way to shield meat from harmful contaminants. There are a few ways to do this, such as confit, potting, and jugging. They’re not recommended these days because there are much better methods less prone to botulism (though confit is still an easy and delicious cooking method!)
Preserving eggs
You can preserve fresh eggs, but not eggs bought from a store. That’s because fresh eggs are covered in a protective, hard-to-see substance called bloom. Commercial egg producers wash the outside of eggs, which eliminates the bloom and actually reduces the shelf life.
Interestingly, while egg producers in the US are required to wash and sanitize eggs to prevent salmonella contamination, producers in the UK are forbidden from washing eggs… for the exact same reason ¯\_(ツ)_/¯
A fresh egg with the bloom can last for up to a month at room temperature, though they’re at their best within a couple of weeks. It’s very important that you don’t wash the egg, and once you refrigerate it, it must stay in the fridge. When working with fresh eggs, store them unwashed, and clean them with soap, water, and a brush before using.
It’s difficult to tell if an egg still has the bloom, because you can’t see it. But with practice, you can feel it — it’s a slightly tacky coating on the eggshell. It’s easier to feel if the egg is damp.
There are many old-fashioned ways to preserve eggs, but the one used most often today is water glassing, where you mix water with pickling or hydrated lime in a container and set your eggs inside. This preserves the eggs for up to two years without much change in texture.
However, water glassing has a number of gotchas:
- The eggs must be fresh, ideally laid that day
- The eggs must be unwashed yet still clean (ie. not covered in droppings but still has the bloom intact)
- You need enough of those fresh, clean eggs to preserve at one time
- If one egg goes rotten in the batch, it ruins the entire batch
We’ve had poor results in our own water-glassing experiments. You really need a large supply of fresh eggs to get enough to effectively water glass, and the chickens need good nest boxes (that they will use) with fresh straw so that the eggs are clean from the get go.
If you have a wood stove, burying eggs in wood ash is a simple and highly effective means of preserving them. 19th century experiments showed a success rate of 80% after eight months.
Another old-fashioned preservation method is pickling eggs. However, even John Townsend, who lives as close to the 18th century as possible, recommends storing pickled eggs in the refrigerator.
Some other methods for preserving eggs
- Bury in salt: doesn’t last long because it dries out the egg
- Brine: also doesn’t last long because it makes the egg too salty
- Bury in wheat bran: wheat bran isn’t common these days, and it imparts a musty flavor in the eggs
- Shellacking: you can coat eggs in shellac or varnish and wrap in paper
- Oil or fat: coat eggs in some sort of oil or fat like butter, preferably tallow
Of course, no guide to preserving eggs would be complete without mentioning century eggs, an ancient Chinese method. The eggs are preserved in an alkaline solution (and not horse urine as so many rumors suggest), which turns them into black gelatinous balls in addition to greatly extending their shelf life. The flavor isn’t for everyone and they’re notoriously difficult to perfect. It took YouTube cook emmymade years to get them right.
The best way to ensure a steady off-grid egg supply is to keep your own laying hens. Chicken food stores much better than eggs.
Preserving dairy
The bad news is that milk is one of the hardest foods to preserve. It doesn’t freeze or dehydrate well. The good news is that you probably won’t have to worry about it unless you have dairy animals that produce overwhelming amounts of milk.
Many people pressure-can milk and reportedly do it safely, but it’s not recommended by the USDA.
Your best bet for preserving dairy for the long haul is to turn it into butter or cheese, which is more easily preserved.
There are two ways to extend the shelf life of homemade butter.
- Culture the cream (which is essentially fermenting it) by adding a buttermilk culture starter, buttermilk, or some yogurt and letting it sit at room temperature overnight before churning the butter.
- Turn the butter into ghee by cooking and straining out the milk solids, which are more prone to spoilage. Ghee is shelf stable for many months.
Cheesemaking is a rewarding but difficult-to-master skill. Especially with hard cheeses. Temperatures, humidity, and many other external conditions have to be just right for the cheese to form correctly. There’s a reason why cheese has been traditionally aged in caves.
Once a wheel of cheese is formed, it can be coated in wax or buried in wood ashes to extend its shelf life. A wheel of waxed cheese can last for a shockingly long time, to the point that some people actually buy and store them as a prep.